3
There’s nothing worse than building a successful WordPress website only to attract spamming robots that leave hundreds, if not thousands, of spam comments all over your posts and pages. Lately, I’ve been having several conversations with people on Google+ about the issue which triggered this WordPress Guide.
This guide will cover a wide range of options and solutions that can be used to combat spam along with a my personal recommendations based on years of experience working with WordPress websites.
Stage 1 – Akismet
The BB Gun. It helps but lacks the power you need to go for the kill.
 Every WordPress website comes pre-installed with Akismet, which is a free spam-fighting WordPress plugin that uses an algorithm to check if a comment is spam based on many factors. All you need to do is go to your WordPress Dashboard and click Plugins. From there, you will see Akismet and Hello Dolly on a default WordPress installation. First of all, delete Hello Dolly, ‘nuf said.
Under Akismet, you will see a blue “Activate” link. Click that then click the blue “Activate your Akismet account.” From there, click the blue Get your API key. Once again, you’ll click “Get An Akismet API Key” on their website which will then take you to a WordPress.com signup page. If you have a WordPress.com login, click I already have a WordPress.com account! and log in. Otherwise, enter your email address, desired username and password and click Sign Up.
Once you authorize your WordPress.com account with Akismet, you’ll finally be taken to this screen with pricing options.
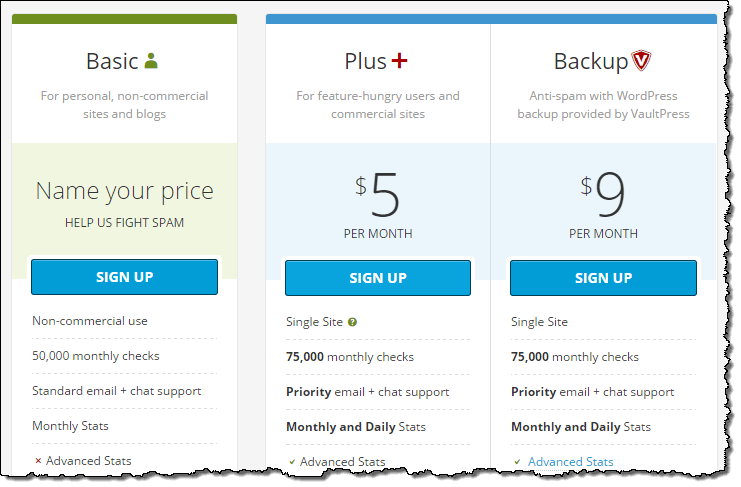
From here, you can opt for the $5/mo plan or use the Basic sign up which allows you to name your price with a pricing slider, one of which is FREE. As long as your website is not a commercial website, you can slide the slider all the way to the left so that it is $0.00/year (free) which will remove the credit card payment options and allow you to enter your first and last name.
Finally, you will get the required API key that you can then use on your website.
We recommend copying this API key to somewhere on your computer for future use. If you have your API key, you can skip all these steps and enter your key when setting up a new WordPress website.
Head back to your WordPress Dashboard and find the Manually enter an API key section. Paste your key in there then click Use this key to activate Akismet on your site.
Now that you are active, Akismet will begin scanning comments and marking spammy comments as spam and place these comments in your Comments > Spam section.
All set right?
Here’s the problem. If you are getting thousands of robot spam submissions on your website, your database will continue to be filled up because the comments are being accepted into your database but are being placed in your spam folder. If you ignore your spam folder long enough, you’ll rack up a massive database size in no time at all which can cause your site to become more and more sluggish in page loading and administrative response times.
Stage 2 – Replacing Your Commenting System
The handgun. It definitely takes care of bots looking for a WordPress commenting form but you’ll be fighting spam in a different way.
You’ve fought a long and hard battle with comment spam and decide, that BB Gun just isn’t doing the job to kill off the spam. What other options do I have to combat this seriously distracting issue? You take to the Internet and look at what popular WordPress websites are doing and realize, Oh! They switched their comment system and outsourced it to a third party!
Great idea! How do I do that? It’s pretty simple. Here’s a few of the most popular options that are available to you.
Disqus Comment System
 Discus is the most popular WordPress comment replacement system that exists. Disqus allows you to moderate and control your filters, control anonymity preferences and is very easy to install. Disqus also integrates social media to share comments and reactions on Facebook or Twitter. They system is based on real time commenting which allows users to see the latest comments first (which may or may not please your readers).
The problems with Disqus is you are forcing your viewers to register on a separate site just to have the ability to make a comment. They will have to register by associating one of their social media accounts or will need to setup an account which requires them to provide an email address which may turn them off from commenting on your site.
Of course, if you decide to switch to Disqus from your WordPress, since the service is linked to your WordPress website, you will be able to transfer your old comments to the Disqus system. If you decide down the road that Disqus isn’t right for you and want to move back to the traditional commenting system, you can ensure all of your comments are synced under Comments > All Comments then deactivate / delete the plugin. Therefore, you won’t lose comments by switching then switching back, a really nice bonus.
Get the Disqus Plugin. Or, install automatically via the WP Dashboard > Plugins > Add New. Search Disqus then
Install Now.
Direct Social Media Commenting
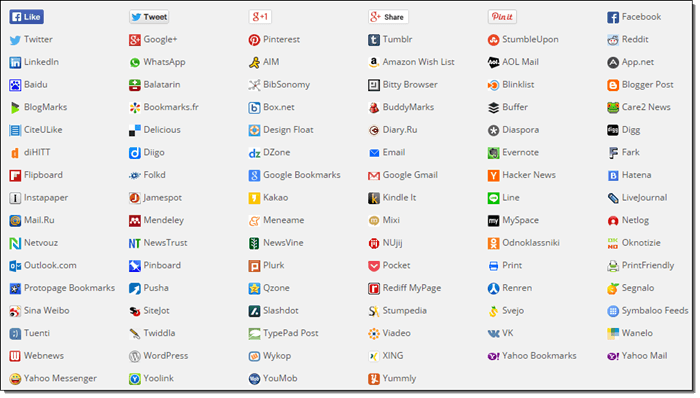
 Another popular approach that some sites use is integrating and using Facebook or Google+ comments to replace the regular WordPress comment system. What this allows is for people to quickly and easily comment on your posts as long as they are registered on and using the social network integration you choose. One benefit is it will help increase the sharing of your content on these social media platforms and traditionally, people will use their real names in their comments, especially Facebook users.
Of course, not everyone uses social media or they have used it in the past and, for whatever reason, decided to delete their accounts and never use their platform again. For these users, you will have completely alienated them and they will not be able to comment (expect nasty contact form submissions for this decision on established websites).
Another major issue you’ll face is the comments themselves belong to Facebook or Google+. When switching to this type of system, you will lose all of your old comments. If you decide that social media commenting isn’t working out like you wanted, any comments received while social media commenting is integrated will be lost (and only available on the social media posts).
I’ve tried going this route on a new blog before and the biggest red flag is the fact that users can dig up your old content and leave links and spam that you will likely never see or be alerted towards. This is especially a big problem in Google+ integration with no resolution because Google+ doesn’t officially support comment integration. In Facebook, you can take advantage of the Facebook comment moderation tool to monitor comments received through your website’s app, however, you’re still left with dealing with spam on a daily basis, just in a different location.
Social Media Integration Solutions for WordPress
Facebook: Facebook Comments Plugin or WP Dashboard > Plugins > Add New. Search Facebook Comments, look for By Alex Moss > Install Now.
Google+: Comments Evolved for WordPress or WP Dashboard > Plugins > Add New. Search Comments Evolved > Install Now.
Although Comments Evolved is the most popular WordPress plugin for Google+ comments, it should be noted that this plugin will also integrate Facebook, Disqus and the traditional WordPress commenting system as an all-in-one solution.
Oh boy! If you integrate all 4 options in Comments Evolved, you get to check for spam in 4 places for quadruple the spam moderation fun! Where do I sign up?!?
Stage 3 – Removing the URL Field in Comments
The Assault Rifle. Now we’re talking. The handgun definitely helped pick off the spammers that are close in range but we’re having problems hitting those pesky long targets. Let’s not mention the fact that some spammers invoke The Matrix and are able to dodge our handgun bullets.
We’ve discussed the potentials of switching your commenting system and the integrated Akismet plugin which helped but some spambots are persistent and are able to spam even though you’ve switched. Even if the integrated systems have virtually eliminated spambots, there’s still ways for spammers to manually attack your content with links that will have to be moderated.
 Question: How can we attack those persistent spambots where it hurts the most?
Answer: Remove the URL field in your traditional WordPress commenting system.
If you remove the URL field from your WordPress commenting system, manual spammers will not be able to submit spam because there is no URL field to complete. However, if you do this the wrong way, spambots will still be able to submit spam because they use a long URL string to form-submit to your website (the spambots do not actually use your form, they bypass it).
Hint: Do not use the widely-publicized CSS trick to hide the URL form. The spambots will continue submitting spam to your website even though your website doesn’t show the URL field.
Now that you’ve removed the URL field, you’ll make it known that you are not a URL-friendly website to spammers looking for target sites to attack.
The Downsides
Of course there’s always a downside to doing this. First, webmasters like myself enjoy researching people who comment on their website to learn more about them. Without the URL being submitted, you will find it harder to discover their latest projects. Most people who fill out the URL field on their comments will naturally link to their latest website, latest article or their latest project because that is what is freshest on their mind.
Secondly, a huge portion of people who comment on blog posts and articles are bloggers themselves. They enjoy commenting to add value to the conversation but they also enjoy getting a few backlinks to their site(s) here and there to attract traffic. If you remove the URL field, you are also removing some people’s willingness to comment.
Stage 4 – The Anti-Spam Plugin
The Nuke (name your deadliest weapon here?). That assault rifle approach did the trick! You were able prevent most of the spambots and manual spammers from submitting spam, but can we take it a step further? What if I don’t want to remove that URL box?
 Introducing Anti-Spam, a free plugin that will help thwart spambots, doesn’t use a required captcha, but still allows the URL field on your website.
I’ve tried several spam prevention plugins available but this one is my favorite by far.
It. Just. Works. There’s nothing to configure which feels too good to be true, but isn’t. Pure magic.
Once you install and activate the plugin, you will notice a drastic, if not complete, reduction is spam ending up in your spam moderation queue. The plugin blocks spambot spam at the source by checking the user agent using JavaScript.
One awesome thing about this is the fact the bulk of the spam your site receives will not even reach your WordPress database. That’s one of the biggest reasons why I love this plugin so much. Best of all, it continues to remain free but the ability to support the author is there with an upgrade to Anti-Spam Pro which adds additional features (a more powerful automatic spam protection, a manual spam protection algorithm and a settings page) for a one-time purchase of $14 on codecanyon.
Get the Anti-Spam Plugin. Or, install automatically via the WP Dashboard > Plugins > Add New. Search
Anti Spam, then find the plugin named
Anti-spam with
By webvitaly then
Install Now.
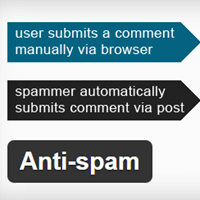
It’s important to note here that Anti-Spam (free version) stops the automated spambots but it doesn’t prevent manual spam submissions from real people using real browsers.
That’s Not a Nuke Then!
You’d be correct in saying that. However, what if you installed/activated the Anti-Spam plugin and deleted the URL field (the assault rifle approach above)?
Now you’ve got a site that uses the default WordPress commenting system that completely blocks most spambots and prevents manual spammers from spamming your site with URLs. Welcome to the solution we use on all of our WordPress projects. We have yet to see a need to even use Akismet because the spam doesn’t reach our database in the first place.
If you really want to keep your URL field for reasons we’ve stated above, your other solution is to upgrade to Anti-Spam Pro. This will add a manual commenting “spam-points algorithm” which will help you keep the URL field in tact but tackle most of the manual spammers.
Ugh – Anti-Spam Adds a Notification to My Comments Page!

Yep, I didn’t like when Webvitality added this notification flag and actually voiced my displeasure about it on their WP plugin support forum. Due to the complaints, he quickly added a new feature that allows us to remove this flag from the comments page, but it’s buried and you’ll have to know where to look.
Use the above GIF to see exactly how to remove the Anti-Spam notification flag. On your Dashboard > Comments page, click Screen Options, uncheck Anti-spam info, click Apply. Done.
How have you handled your WordPress spam issue? Did this guide help you? Please leave a note in the comments below and let us know!


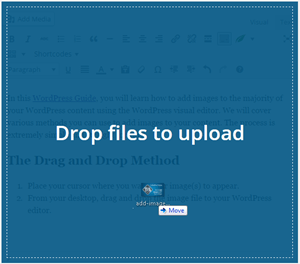
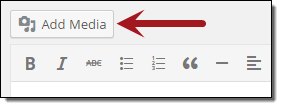 Another popular method that people continue to use (including me) is to use the Add Media button. The process is very similar to the drag and drop method.
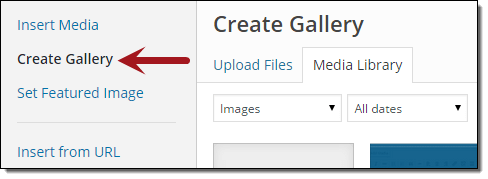 Now that WordPress has been upgraded to include native galleries, you no longer need a plugin. Here’s how to add an image gallery into your posts.
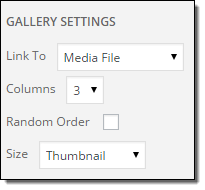 Here’s some recommended settings:

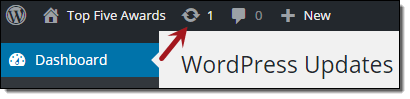 Another huge mistake we see is clients ignoring important updates. WordPress does an excellent job keeping their content management system secure when potentially severe security problems present themselves.
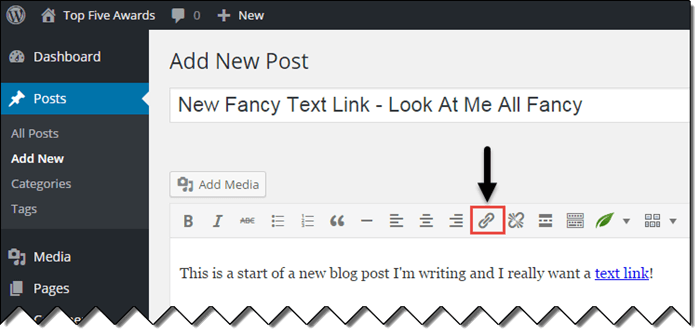
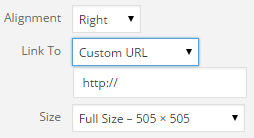 You can also hyperlink an image that you’ve uploaded to your content. All you do is use the Add Media button, drag your image to your browser to upload and then on the right, look for the section shown in the screenshot.
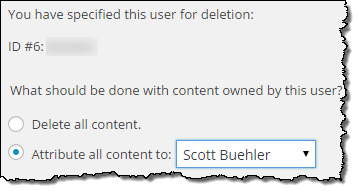
 Once you are established with your new WordPress website, you will likely want to add new users so that they can help you write new content or manage your existing content. Thankfully, WordPress makes this extremely easy. In your WordPress Dashboard, hover your mouse over Users then click All Users.
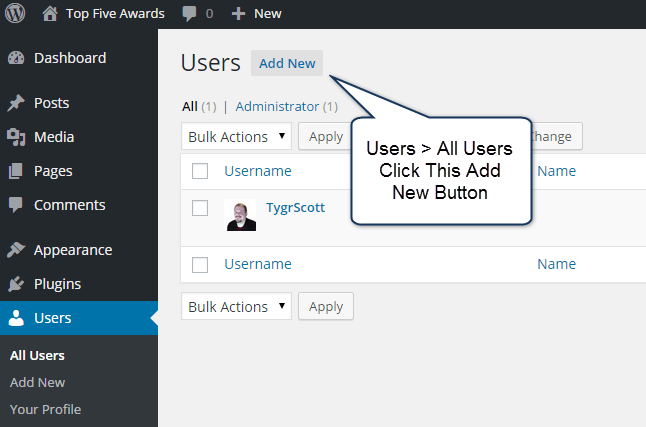
 From there, everything is straight forward.
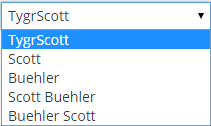 Head back to Users > All Users and click on their username or the edit link below their username. On this page, you can edit the profile name, nickname and as we’re showing here in our screenshot, the Display name publicly as option which is how the name will appear on your front-end pages.
 Users > All Users.


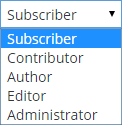 There are 5 default user roles that ships with your WordPress installation. In this guide, we will quickly cover what these roles mean to your new user, what they can do on your WordPress dashboard (permissions) and help you decide which role to select.
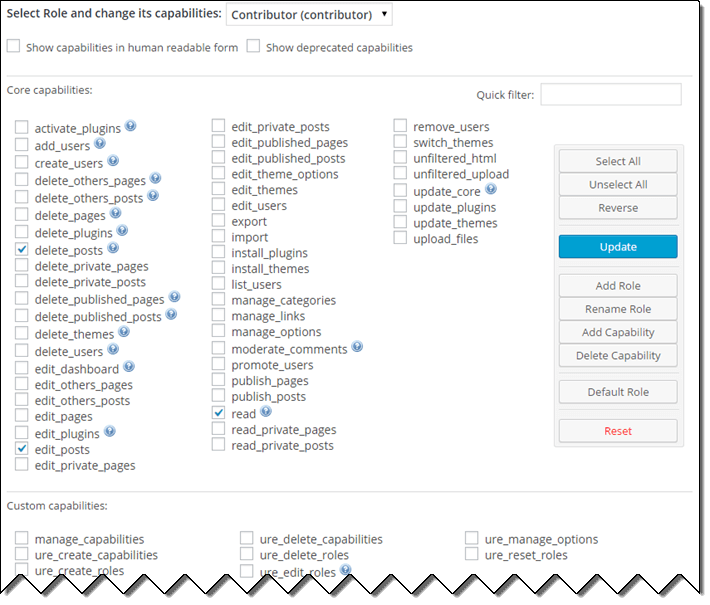
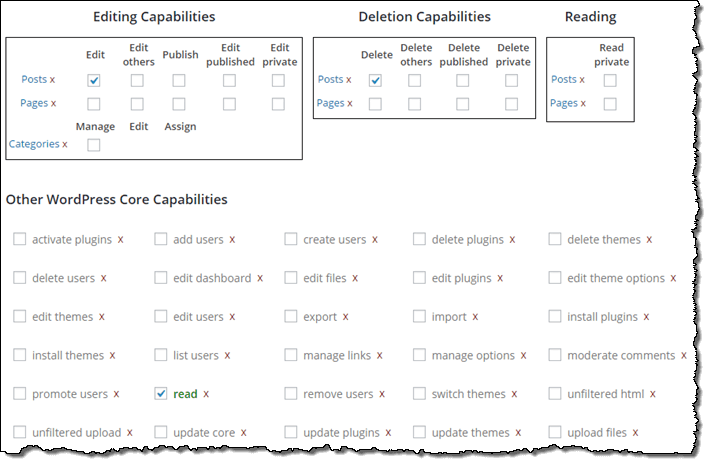
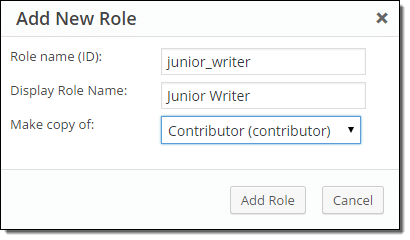 From this screen, you can easily “Add Role,” “Rename Role,” and even do more advanced things like add or delete capabilities for these roles. As we show you on the right, adding a new role is straight forward. Enter the role name, what it displays and select what default role you’d like this role to mimic before you begin editing its capabilities.