
Setup Your WP Engine WordPress to Send Email
Did you transfer or install WordPress on WP Engine and need to figure out how to configure your site to restore the email functionality? We touched on this in our WP Engine review, however, we thought we’d create a separate guide for those that have already made the switch and in panic mode because they aren’t getting their contact form or comment alert messages.
We faced this exact scenario, hit up Google Search, spent hours in research and testing, and then we figured out this solution which worked the best for our needs.
Step 1: Install Easy WP SMTP
We recommend Easy WP SMTP because it works 100% of the time for us and our clients. We’ve tried 5 plugins to accomplish this task and this plugin did the job perfectly, every time.
Click Here to Download or Review Easy WP SMTP
Step 2: Find an Email Provider for Your Domain
We only work with the best and in this case, the best is Google Apps for Work. You can register your account and try their service free for 30 days to make sure it is a good fit for your needs.
The best part about Google Apps is it uses the familiar and popular Google Gmail service to deliver your emails. This means, you can configure your domain email just like you can with Gmail, including forwarding, signatures, filtering and, of course, take advantage of their powerful spam filtering features.
The cost is $5 per month or $50 per year for one user.
Have multiple emails? Don’t panic. You can setup email aliases with your Google Apps account so that all of the emails are delivered to a single account. If you need more than one account / user, you can setup additional accounts for the same $5/$50 charge.
Used to using POP3? So are we. Here’s how to enable POP3:
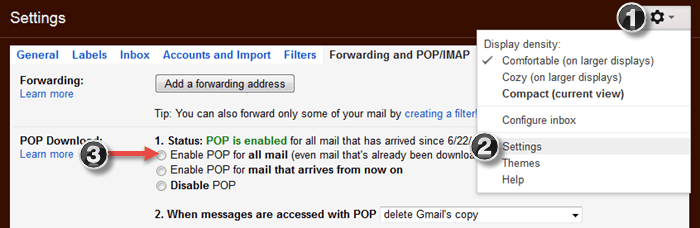
- Click the cog in the upper right.
- Click settings.
- Click the Forwarding and POP/IMAP tab
- Click Enable POP3.
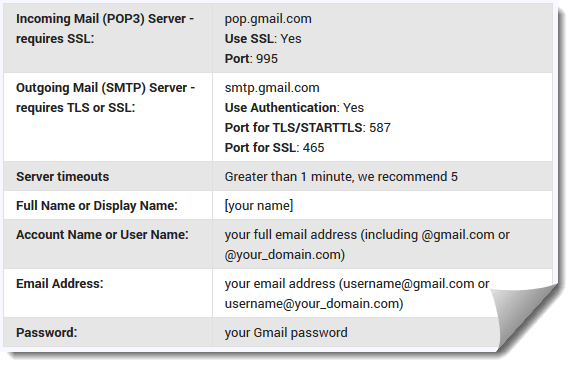
Now, go into your email client and setup a new account. Popular email clients like Thunderbird will auto-configure your account for Gmail, but if you need the manual settings to use, here they are:
Step 3: Configure Easy WP SMTP
Once you have the plugin installed and you have your Google Apps configured, you now need to configure Easy WP SMTP to work so that it can send emails to you.
In your WP dashboard, go to Settings > Easy WP SMTP and you will find the screen we show here.
If you decide to use Gmail, take advantage of the settings that work best for us in the screenshot we provided to the left.
Once saved, use the “Testing and Debugging Settings” section on this same page to send yourself an email to make sure everything is working correctly.
That’s it! Now you’ll receive any messages generated from your WordPress website including any contact form submissions, WP upgrade alerts, new comment alerts and more.
If this guide helped you, please leave us a comment and let us know. Of course, consider sharing this on social media and your website to help support us.