

How to Quickly Add a Contact Form in WordPress
Need a way to allow someone to contact you from your website? Rather than offering a list of contact form plugins that you’d have to choose from and figure out, we are going to use one of the most popular and easiest contact form plugins available and walk you through the entire process of adding a form to a contact page. Let’s begin, shall we?
Step 1 – Install Contact Form 7
With almost 27 million downloads and over 1 million active installs, Contact Form 7 is my go-to choice for installing a contact form on a WordPress website, whether it be my own sites or on client websites. It just works without any hassle or huge learning curve.
After you have successfully installed Contact Form 7, click Activate Plugin or go to Plugins > Installed Plugins and click activate from there. You should notice a new Contact section has been added to your dashboard. Ignore it for now.
Step 2 – Create a Contact Us Page
Go to Pages > Add New.
In the title, enter the name of the page, traditionally called Contact Us.
Click in the WordPress visual editor (where you type your content) and you’ll notice a permalink has been automatically generated. Click the edit button if you wish to rename to something shorter like /contact/.
Add your desired content that you want to appear on your contact page. You can add content that you want to appear before and after the form.
Click the Save Draft button to save your work.
Step 3 – Locate / Edit Your Contact Form
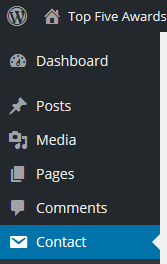 A shortcode is a small bit of code that Contact Form 7 uses to generate your contact form. In your WordPress Dashboard, click on the new Contact section as I’m showing you on the left.
This will take you to a new page labeled Contact Forms with one form already created for you.
Feel free to click the edit link on the default form and rename the form to Contact Page if you plan on having multiple contact forms then click the blue Save button.
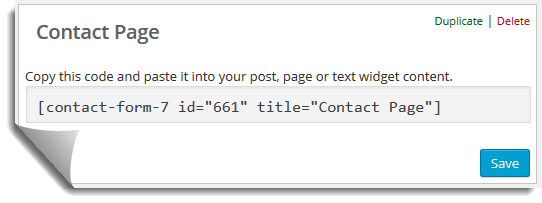
Copy the shortcode they provide you (every id is different, don’t use ours) to your clipboard with right click > copy.
Step 4 – Place That Code!
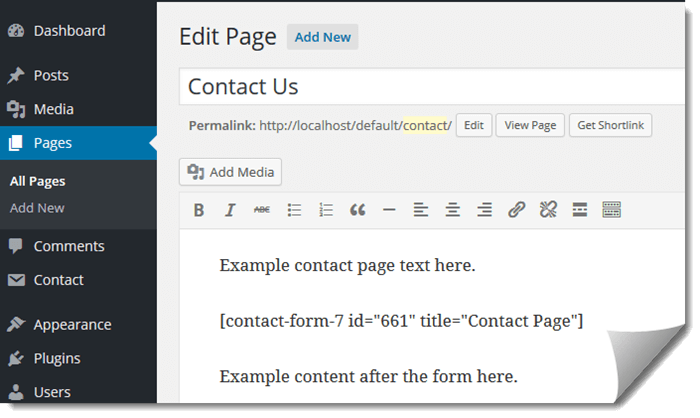
Head back to Pages and click the edit link under the draft contact page we created in step 2. Now paste the shortcode where you’d like your contact form to appear within your content. Here’s our finished example:
Click the blue Publish button to make your new contact form live.
Step 5 – Test Your Form
Once your page is published, click the View Page button (shown in screenshot above) and it will take you to your new contact form page.
On the page, go ahead and fill out the form and send it to yourself to make sure the contact form is working (and that you receive an email).
That’s it! Your form is live and ready for your viewers to submit a request to you.
Customizing
Once you start adding multiple contact forms to your website, you may find that figuring out where the submissions are coming from and knowing what priority to treat the messages to be extremely important.
Pro Tip 1
Contact > Edit your form. Scroll down to the Mail section and look for Subject: on the left.
You can add a label in front of [your-subject] so that when the mail is delivered, you’ll know where the request was received from. Here’s an example we use on our contact form: T5A Contact Page: [your-subject]
This does two things, one, I can setup my email client to FILTER all messages with a subject that has T5A in it and place these messages in a high priority folder. Second, Contact Page, this tells me where the contact form was filled out. Without ever opening or previewing the email received, I already know what site and what form was filled out. Neat, right?
Pro Tip 2
You can edit your form to add new fields or to remove fields that you don’t want to appear on your site. All you need to do is edit your form and click the “Generate Tag” button which will give you several options to choose from. Each selection will offer some instructions to complete along with some options.
Once you fill out your new desired entry, you will need to follow instructions and add the shortcodes given to you where they want it. The first code will be copied to the form on the left (add it wherever you want the form entry to appear on your live form). The second code will be copied to the Mail template section which is the template that is generated and sent to you via email. If you forget the add that second code to the mail section, you won’t see what the user has entered into your form.
Once done, click the blue Save button and your changes will already be live on your site (no changes needed to your contact page). Test it, see how the form appears on your site and see how the email looks when delivered. From there, you can make changes if needed.
How Are You Using Contact Form 7?
Leave a comment below to let our readers know how you are using Contact Form 7.
Remember to share this guide if it has helped you.