
How to Add Images to WordPress Posts and Pages
In this WordPress Guide, you will learn how to add images to the majority of your WordPress content using the WordPress visual editor. We will cover various methods you can use to add images to your content. The process is extremely simple and straight forward.
The Drag and Drop Method
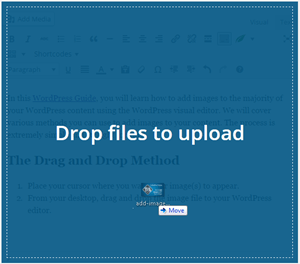
- Place your cursor where you want your image(s) to appear.
- From your desktop, drag and drop the image file to your WordPress editor.
Once the image is dragged to your WordPress editor, you should see what we are showing in our screenshot with a message to Drop files to upload. Once you release the click on your mouse, WordPress will upload the image to your Media Library.
Add your title, alt text, caption and alignment settings then click Insert into post.
The Add Media Method
 Another popular method that people continue to use (including me) is to use the Add Media button. The process is very similar to the drag and drop method.
One advantage to using this method is an upload is not required if you already have a suitable image uploaded already. You can select the image, customize the description and then Insert into post.
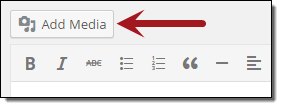
- Place your cursor where you want the image(s) to appear.
- Click the Add Media button.
- Drag and drop the image to the add media screen.
Or, if you already have an image ready to be used, click the Media Library tab and click the image you want to use in the post. If you already have thousands of images, you can also use the search function to find the image.
Add an Image Gallery
 Now that WordPress has been upgraded to include native galleries, you no longer need a plugin. Here’s how to add an image gallery into your posts.
- Place your cursor where you want the gallery to appear.
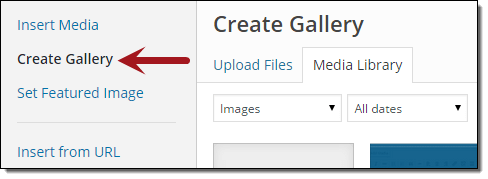
- Click Add Media.
- Click Create Gallery.
- Choose the Upload Files tab to add new images or choose Media Library to use existing uploaded images.
- Select the images you want to appear in the gallery (check mark will appear).
- Click the Create a new gallery button.
- Customize your gallery appearance.
- Click the Insert gallery button.
Regarding customizing your gallery appearance in step 6, on that screen you can drag and drop the images to change the order of appearance. On the right under Gallery Settings, you can choose how you want the media to appear in your post, how many columns, randomize order and the image size you want to use.
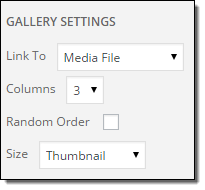 Here’s some recommended settings:
- Link To: Media File
- Columns: 3 or 4 (If you have 6 images, use 3 to make it display evenly)
- Size: Thumbnail
The actual appearance of your gallery will depend on the theme you are using. With Thrive Themes, here’s a live example of how the gallery appears which adds a really neat carousel effect when clicking on an image.
Image credits for these images are available here.
Afterwards, you can click the gallery within your WordPress editor and click the pencil icon to edit the gallery if needed.
Adding an Image From a URL
- Click Add Media.
- Click Insert from URL.
- Paste direct image link.
- Add link text.
- Click Insert into post.
Some Image Tips
Make sure you have copyright permission to use images in your posts.
Consider optimizing your image sizes. If you are running a photography blog, then by all means use the full high-resolution images, but if you are running a standard site with traditional images, resize the images to fit your content. It makes no sense to upload an image that is 4,000px wide when your content area can only fit a 750px width image. This will help drastically reduce download times on your pages.
If you are uploading a JPG or PNG, consider using a web service like TinyPNG or using an image optimization plugin. Anything you can do to speed up page loading times on image-heavy pages will help the overall user experience and potentially help you rank higher in search engine indexes.
Don’t add images “just because.” Your ultimate goal should be helping the user with the topic you are writing about. Consider using images to help the user visually understand what you are referencing in your content. In our case, this post includes multiple screenshots with arrows to help you through the process of adding an image along with an example image gallery so you can see one in action.